
To delete Facebook notifications on iPhone, swipe left on the notification and tap “More” then “Delete.” Notifications on your iPhone can quickly clutter up, causing distractions and taking up unnecessary space.
Managing your notifications effectively can help streamline your digital experience and reduce distractions. One popular platform where notifications can accumulate is Facebook. By carefully organizing and deleting Facebook notifications on your iPhone, you can ensure that you only receive the essential updates that require your attention.
In this guide, we will provide you with a simple step-by-step tutorial on how to efficiently delete Facebook notifications on your iPhone device, ensuring a smoother and more focused digital experience.
Credit: www.cnbc.com
Managing Notifications
To maintain a clutter-free notification center, learning how to delete Facebook notifications on your iPhone is crucial. Managing Notifications ensures a focused digital experience.
Accessing Notifications
Follow these simple steps to access your Facebook notifications on your iPhone:
- Open the Facebook app on your iPhone.
- Tap the “Menu” icon located in the bottom right corner.
- Select “Notifications” to view all your recent notifications.
Customizing Notification Settings
Customizing your notification settings allows you to tailor your Facebook notification preferences:
- Go to the “Settings” section within the Facebook app.
- Choose “Notifications” to access specific notification customization options.
- Toggle notifications on/off for different activities like comments, likes, and friend requests.
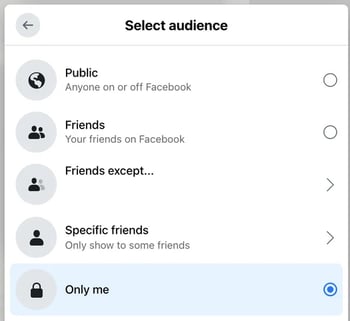
Credit: blog.hubspot.com
Deleting Notifications
When it comes to managing your notifications on Facebook via your iPhone, knowing how to delete them efficiently is key. Let’s delve into the process of Deleting Notifications with a focus on Individual Notifications and Bulk Notifications Deletion.
Individual Notifications
To remove a single notification on your Facebook app, tap and hold the notification you want to delete. A menu will appear, select the ‘Delete’ option, and the notification will be gone.
Bulk Notifications Deletion
If you wish to clear multiple notifications at once, navigate to the notification tab, click ‘Edit’ in the top right corner, select the notifications you want to delete, then tap on ‘Delete’ to remove them in bulk.
Maintaining Clean Notification
Maintaining a clutter-free notification area on your iPhone is crucial. Discover how to easily delete Facebook notifications to keep your device organized and distraction-free.
Maintaining Clean Notification H3 headings must be in HTML syntax. When it comes to managing your Facebook notifications on iPhone, maintaining a clean notification area is essential for staying organized and focused. Excessive notifications can be distracting and overwhelming, jeopardizing your ability to stay on top of important updates and alerts. In this section, we will explore the best practices for maintaining a clutter-free notification center on your iPhone and how to automate notification management for a seamless user experience.Best Practices
Using the best practices for keeping your Facebook notifications tidy is essential for a streamlined user experience. Start by regularly reviewing your current notifications and taking action on each one. Whether it’s responding to a friend’s request or marking a notification as read, promptly addressing each item ensures that your notification center doesn’t become overcrowded with old and irrelevant alerts. Another essential practice is to customize your notification settings. By fine-tuning your preferences, you can choose to receive notifications only for the most critical updates, reducing the overall volume of alerts and enhancing their relevance.Automating Notification Management
Automating the management of Facebook notifications on your iPhone can be a game-changer when it comes to maintaining a clean notification center. Leveraging automation tools and features can help streamline the process and ensure that your notifications are efficiently handled without manual intervention. Consider utilizing the “Manage Notifications” feature within the Facebook app settings to customize your notification preferences. By doing so, you can specify the types of notifications you want to receive and the frequency at which you receive them. This level of customization can significantly reduce the number of irrelevant notifications that flood your iPhone, creating a more focused and clutter-free user experience. In addition, take advantage of iOS features such as Notification Center grouping, which organizes notifications by app or thread, reducing visual clutter and making it easier to manage multiple alerts effectively. By implementing these best practices and embracing automation tools, you can ensure that your Facebook notifications on iPhone are efficiently managed, leading to a clean and organized notification center that enhances your overall user experience.
Credit: www.linkedin.com
Frequently Asked Questions Of How To Delete Facebook Notifications On Iphone
How Do I Delete All My Notifications At Once On Facebook?
To delete all your notifications on Facebook at once, go to the globe icon and click “See All Notifications. ” Then, click the grey “Clear All” button at the top-right corner of the notifications menu. Confirm your choice in the pop-up window to delete all your notifications in one go.
How Do I Remove Facebook Notifications From My Iphone?
To remove Facebook notifications from your iPhone, go to Settings, then Notifications, find Facebook, and toggle off Allow Notifications.
How Do I Delete All Notifications?
To delete all notifications at once, go to the notification center, select all, and click delete.
Why Wont My Notifications Go Away On Facebook?
Facebook notifications may not go away due to technical glitch. Try refreshing the page or app, clearing cache, or updating the app for a fix.
Conclusion
In just a few simple steps, you can effectively manage and delete Facebook notifications on your iPhone. By following the methods outlined in this post, you can streamline your notification experience and enjoy a clutter-free digital environment. Implement these tips and take control of your Facebook notifications today.
Keep your device organized and experience a more peaceful online experience.