
To check cookies on iPhone, go to Settings, scroll down to Safari, then tap on Advanced and Website Data. On iPhone, you can easily manage and delete cookies by following these steps.
Cookies are essential for websites to remember your preferences and login information. Understanding how to check and control cookies on your iPhone can help you protect your privacy and enhance your browsing experience. By regularly checking and managing your cookies, you can ensure a safer and more personalized online experience.
Let’s explore how you can easily access and control cookies on your iPhone’s Safari browser for a seamless browsing experience.
:max_bytes(150000):strip_icc()/001-enable-cookies-on-iphone-4178333-fce1dc23873a4d1495315cd3afa215d8.jpg)
Credit: www.lifewire.com
Why Checking Cookies Is Important
Knowing how to check cookies on your iPhone is crucial for managing your online privacy and security. Cookies are small text files that websites store on your device to track your activity and personalize your browsing experience. However, they can also be used for targeted advertising and unauthorized data collection. By monitoring and controlling cookies, you can take charge of your online footprint, protect your personal information, and enhance your digital security.
Protecting Your Privacy
By checking the cookies on your iPhone, you can safeguard your privacy from intrusive tracking and unauthorized data collection. Proactively managing cookies allows you to restrict the information that websites can gather about your online behavior, reducing the risk of your personal data being exploited without your consent. By maintaining control over the cookies stored on your device, you can prevent unwanted tracking and maintain a greater level of privacy while browsing the web.
Managing Your Online Accounts
Understanding how to check cookies on your iPhone empowers you to manage your online accounts more effectively. By reviewing and controlling the cookies stored by various websites, you can ensure that your login credentials, browsing history, and personalized preferences are secure. Monitoring and managing cookies can also help you identify and mitigate potential security risks associated with unauthorized access to your online accounts, thereby strengthening the overall security of your digital presence.
Credit: cookie-script.com
Using Safari To Check Cookies
Checking cookies on your iPhone can help you manage your privacy and security settings effectively. With Safari, you can easily access and control the cookies stored on your device. Follow the steps below to ensure a safer browsing experience.
Accessing Safari Settings
- Open Safari browser on your iPhone.
- Tap on the Settings icon in the bottom right corner.
- Scroll down to find Safari settings.
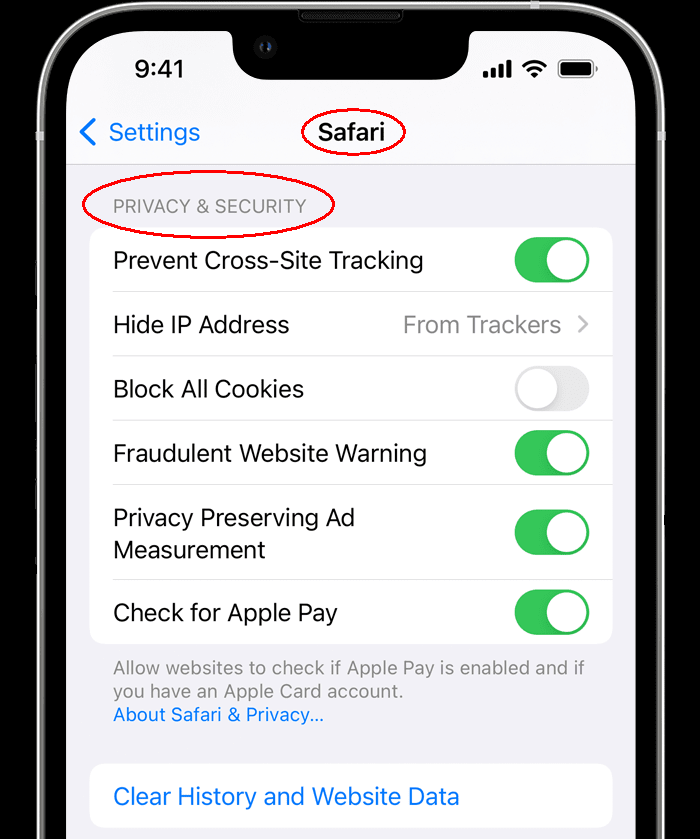
Finding The Privacy & Security Section
- In the Safari settings, locate and tap on Privacy & Security.
- Under the Privacy & Security section, you will find various options for managing your browsing data.
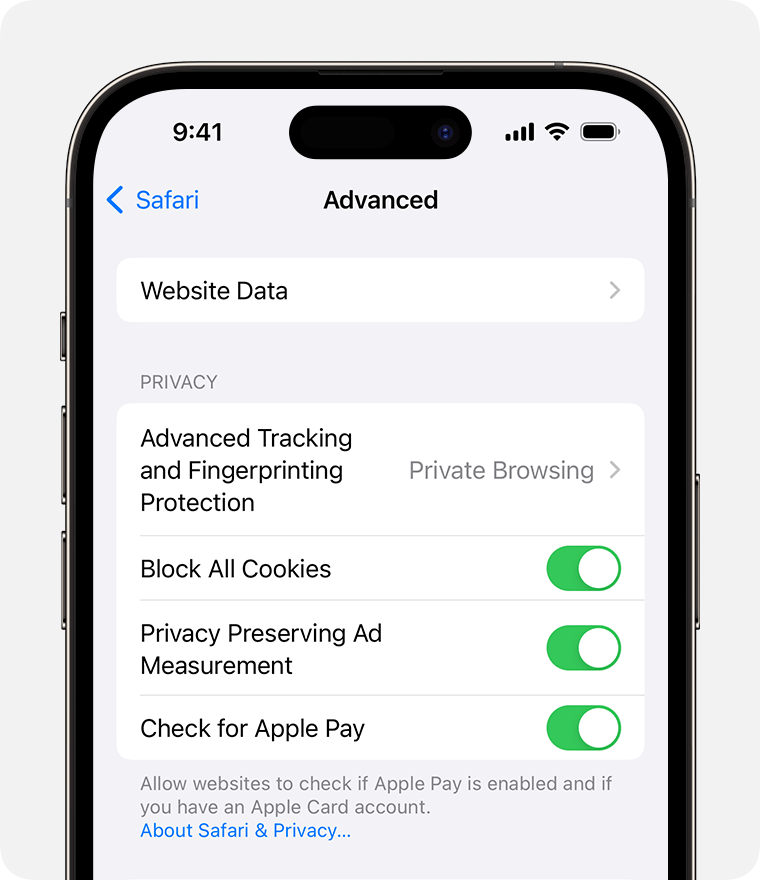
Viewing And Deleting Individual Cookies
- Within the Privacy & Security section, tap on Advanced.
- Click on Website Data to view the list of websites storing cookies on your device.
- To delete a specific cookie, swipe left on the respective entry and tap Delete.
- For more control, tap Edit and select multiple cookies to delete in one go.
Using Third-party Apps
Exploring cookie management apps:
Installing and configuring a cookie checker app:
Credit: support.apple.com
Enabling Do Not Track
If you’re concerned about online privacy and want to manage how websites track your browsing behavior, enabling the Do Not Track feature on your iPhone can be a useful step. This article will guide you through the process of checking cookies on your iPhone and specifically focus on understanding and enabling the Do Not Track feature in Safari.
Understanding The Do Not Track Feature
The Do Not Track (DNT) feature is a setting that allows users to inform websites and online services that they do not want their browsing behavior tracked. This request is typically communicated via a DNT HTTP header that is sent with each web page request. However, it’s important to note that compliance with DNT requests is not mandatory for websites, and it’s ultimately up to the individual websites to honor this setting.
Enabling Do Not Track In Safari
Enabling the Do Not Track feature in Safari is a straightforward process. Follow the steps below to activate this setting:
- Open the Settings app on your iPhone.
- Scroll down and tap on Safari.
- Under the Privacy & Security section, locate the toggle switch for “Do Not Track” and enable it by tapping on the switch.
Clearing All Cookies
Clearing cookies on your iPhone can help improve your browsing experience, protect your privacy, and free up storage space. While cookies can be useful for storing information like login credentials and website preferences, they can also accumulate over time and affect the performance of your device. If you want to clear all the cookies on your iPhone and start fresh, follow this step-by-step guide.
The Need For Clearing All Cookies
Clearing all cookies from your iPhone is essential for various reasons:
- Privacy: Clearing cookies ensures that any tracking information or personal data stored by websites is removed, reducing the risk of your online activities being monitored.
- Security: By clearing cookies, you can prevent unauthorized access to your accounts since stored login credentials will be removed.
- Browser performance: Clearing cookies can improve the speed and performance of your browser, as the accumulated data can slow down the loading times of web pages.
- Storage space: Deleting cookies frees up storage space on your device, especially if you frequently browse the web and have accumulated a large number of cookies.
Step-by-step Guide To Clearing All Cookies
Follow these simple steps to clear all cookies on your iPhone:
- Open Settings: Tap on the “Settings” icon on your home screen to access the device’s settings.
- Scroll down and tap Safari: In the settings menu, locate and tap on “Safari” to access the browser settings.
- Tap Clear History and Website Data: Under the Safari settings, tap on “Clear History and Website Data” to remove all browsing history, cookies, and other browsing data.
- Confirm the action: A pop-up will appear, asking you to confirm the clearing of history and website data. Tap “Clear History and Data” to proceed.
That’s it! Now all the cookies stored on your iPhone have been cleared, providing you with a fresh browsing experience. Remember that clearing cookies will log you out of websites and remove any personalized settings, so you may need to re-enter login details and adjust preferences on your favorite websites.
Frequently Asked Questions Of How To Check Cookies On Iphone
How Do I See Cookies On My Iphone?
To view cookies on your iPhone, go to Settings, then scroll down and tap on Safari. Next, tap on Advanced, then choose Website Data. Here you’ll find a list of all the websites that have stored cookies on your device.
Should You Clear Cookies On Iphone?
Yes, it’s beneficial to clear cookies on your iPhone to improve privacy and enhance browsing experience.
How Do I Set Cookies On My Iphone?
To set cookies on your iPhone, go to Settings, find Safari, tap on Privacy & Security, and enable “Block All Cookies. “
How Do I Check My Cookies Settings?
To check your cookies settings, go to your browser’s privacy or security settings and look for the section on cookies.
Conclusion
Checking cookies on your iPhone is essential for managing your online privacy. By following the simple steps outlined in this guide, you can easily view and manage the cookies stored on your device. Taking control of your cookies allows you to enhance your browsing experience and protect your personal information.