Knowing how to fix an Apple iPhone starts with a choice, not a screwdriver. The real answer isn’t just a set of steps for a single problem. It’s a decision-making process that guides you to the best solution for your specific situation, balancing cost, time, and your phone’s long-term health.
This guide will navigate you through that entire process, from figuring out what’s wrong to confidently choosing and executing the right repair path.
Accurately Diagnose Your iPhone Problem
Before you can fix anything, you need to know what’s actually broken. Jumping straight to repair options for a screen that won’t turn on is premature if the issue is simply a dead battery or a software crash.
Taking a moment to diagnose saves time, money, and the frustration of pursuing the wrong fix.
Common Symptoms and Their Likely Causes
Many iPhone issues fall into familiar categories. A black screen or a device that won’t turn on often points to a deep battery discharge, a failed battery, or a power-related hardware fault.
If your iPhone is stuck on the Apple logo or restarting repeatedly, this is typically a sign of a software malfunction that interrupted a critical system process.
Problems like a cracked screen or a unresponsive charging port are clearly physical damage. However, symptoms like poor speaker sound or a camera that won’t focus can stem from both software glitches and hardware failures.
Essential Pre-Repair Troubleshooting
Every single repair journey must begin with these safe, simple steps. They resolve a surprising number of issues instantly.
First, perform a forced restart. The method varies by model but generally involves pressing and quickly releasing a volume button, then pressing and holding the side button until the Apple logo appears.
This clears the device’s memory without deleting your data and can fix temporary freezes. Next, try a different charging cable and power adapter to rule out accessory failure.
Finally, check for a software update in Settings > General > Software Update, as updates often contain bug fixes for known issues.
Using Built-in and Official Diagnostics
Your iPhone has tools to help. For battery concerns, go to Settings > Battery > Battery Health & Charging to see your battery’s maximum capacity and peak performance capability.
Apple also offers remote diagnostics. You can start a repair request through the Apple Support app or website, and a support advisor may run diagnostics to help identify the problem before you commit to a service.
The Complete iPhone Repair Ecosystem
Once you have a clearer idea of the problem, you need to understand the landscape of solutions available to you. Each option exists for a different type of user and situation.
Apple’s Official Service Channels
This is Apple’s own repair network. It includes in-person service at an Apple Store Genius Bar, service through Apple Authorized Service Providers, and mail-in repair where you send your device to an Apple repair center.
Repairs here use genuine Apple parts and are performed by technicians certified by Apple. This service comes with an Apple Limited Warranty for the repair itself, typically for 90 days or the remaining term of your original warranty or AppleCare plan, whichever is longer.
Coverage type is crucial. Your repair might be at no additional cost if it’s under the Apple Limited Warranty for a manufacturing defect, covered by your AppleCare+ plan benefits for accidental damage (with a service fee for each incident), or a paid out-of-warranty service.
Independent Repair Shops
This is a broad category ranging from highly skilled specialists to quick mall kiosks. The key differentiator is the parts they use and their technical expertise.
Some shops may use high-quality replacement parts that mimic Apple’s, while others use cheaper components. A key point is that only Apple and members of its Independent Repair Provider program have access to certain proprietary parts, software calibration tools, and diagnostics.
For example, a non-certified display replacement will often cause the loss of True Tone functionality because the phone cannot calibrate the new screen.
The Self-Service Route
Apple now officially supports this path through its Self Service Repair program. It provides access to genuine Apple parts, tools for rent or purchase, and the same repair manuals used by their certified technicians.
This path demands patience, a meticulous approach, and comfort with delicate electronics. It is realistically suited for individuals with technical confidence and a suitable workspace.
Independent sites also offer free repair guides and sell parts and toolkits, but the parts are not genuine Apple parts and may not meet Apple’s performance standards.
Choosing Your iPhone Repair Path
This is the critical crossroads. The best choice depends on a mix of factors unique to you and your device. Let’s break down the decision process.
Factors That Determine the Best Choice
First, consider your warranty and coverage. Is the device under the original Apple Limited Warranty or an AppleCare+ plan? Using a non-Apple service for certain repairs will void that coverage for related future issues.
Evaluate the problem’s complexity. Simple battery swaps or screen replacements on older models are more DIY-friendly than fixing back glass damage or internal logic board issues. Your own technical skill and confidence are honest benchmarks here.
Then, balance cost versus value and time. An official Apple screen repair might cost more than a third-party one, but it preserves features and doesn’t harm your phone’s resale value. Ask if saving money now could cost more later.
A Simple Repair Decision Guide
Follow this logical flow to narrow your options. Start by asking if your iPhone is under AppleCare+ or its original warranty for this issue.
If yes, using Apple service is almost always the best choice to maintain your coverage. If no, ask if the problem is complex, like water damage, back glass breakage, or anything involving the main board.
For complex issues, a professional repair from Apple or a highly trusted specialist is safest. For simpler issues like a battery or screen, weigh your skill and risk tolerance against the value of certified repair benefits.
Understanding the Risks of Non-Certified Repairs
Choosing a cheaper, unofficial repair often involves hidden trade-offs beyond just voiding warranty. It’s a true calculus of risk.
Using non-genuine parts can lead to the permanent loss of key features. Face ID and True Tone are the most common casualties because their calibration is tied to specific Apple components and software.
Future iOS updates can sometimes detect unofficial parts and display persistent warning messages. The phone’s internal repair history is logged, and this can significantly reduce its trade-in value with Apple or resale value.
Most critically, improper repairs can compromise safety, especially concerning the battery. The new battery removal method used by certified technicians is designed to reduce risk, which a DIY approach might not replicate safely.
Getting Your iPhone Fixed by Apple
If you’ve chosen the official path, here is how the process works and what you can expect in terms of service pricing and experience.
Initiating a Service Request
The process starts on your iPhone using the Apple Support app or on the Apple website. You describe your issue, and the system will guide you.
You can use the estimate tool to get an idea of potential costs for common issues like battery service or screen repairs. For a precise estimate, you will need to complete a diagnostic or speak with an advisor.
You then choose your service method: schedule a visit at an Apple Store or Authorized Provider, or set up a mail-in repair where Apple sends you a box to ship your device.
Understanding Apple Service Pricing
Apple’s service pricing is tiered based on your coverage type and the repair needed. For out-of-warranty repairs, there is a fixed service pricing for batteries and screens.
Other issues may incur additional fees or, in cases of severe damage, require paying the full replacement value for the device. It’s vital to get a clear estimate upfront.
If you have AppleCare+, screen repairs and battery service (if below 80% capacity) are covered with a service fee for each incident. Damage to the back glass, however, often carries a higher fee than front screen repairs.
The Service Experience and Timeline
For a Genius Bar visit, you’ll have an appointment with a technician who will diagnose the device in person. Many common repairs like screen or battery replacements can be done while you wait, often in under two hours.
For mail-in repairs, you ship your phone to an Apple Repair Center. The typical turnaround is 3-5 business days once received, plus shipping time. For critical needs, the Express Replacement Service may be an option.
This premium service, where available and for eligible issues, involves Apple sending you a replacement iPhone before you send yours back, minimizing downtime.
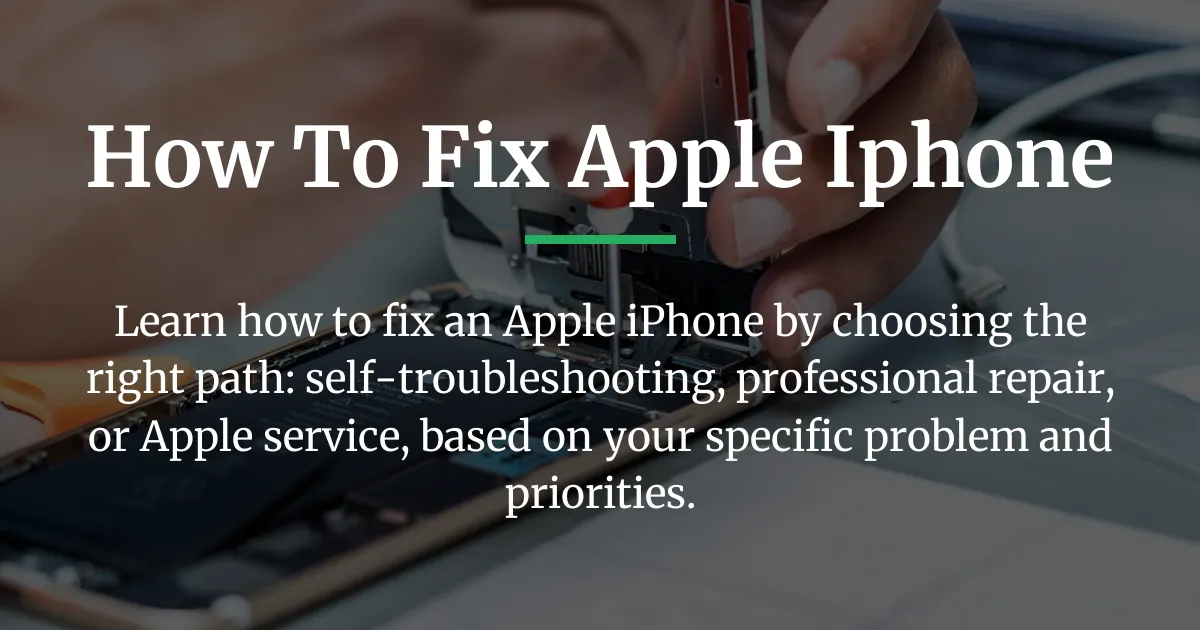
Fixing Your iPhone Yourself
Embarking on a DIY repair requires the right mindset and preparation. It’s a project, not a quick fix.
Prerequisites for Self-Repair
You need a clean, well-lit, and organized workspace free of clutter. Magnetic project mats are incredibly helpful for keeping tiny screws in order.
You must have the correct tools. Apple’s Self Service Repair store offers tool kit rentals for this purpose. Using improper tools is the fastest way to damage your iPhone further.
Most importantly, you need time and patience. Rushing leads to mistakes. Set aside several hours, read the entire repair manual first, and watch video guides if available.
Following a Repair Manual Safely
Whether using Apple’s official manual or a trusted free repair guide, follow every step in order. Do not skip ahead.
Pay utmost attention to all safety warnings. The steps for disconnecting the battery must be followed precisely before working on any other component to prevent shorts.
Take photos with your phone at each disassembly stage. This creates a visual reference for reassembly, which is often harder than taking the device apart.
Sourcing Parts and Tools
For the highest compatibility, source genuine Apple parts through their Self Service Repair store. This is the only way to ensure features like battery health metrics and display calibrations will work.
Third-party parts markets offer a wide range of quality. Some “quality replacement parts” can be very good, but they are not genuine. Research is essential, and understand you are accepting the trade-offs discussed earlier.
If you are not purchasing a toolkit, renting one from Apple ensures you have every specialty driver and tool required for your specific iPhone model.
After Your iPhone Repair
The job isn’t done when the last screw is in. Proper post-repair steps ensure success and protect your investment.
Post-Repair Verification
Before fully reassembling the device, reconnect the battery and perform a basic function test. For a screen repair, check touch sensitivity and color.
For a battery, check that it charges. For a camera, test all lenses. Ensure buttons, speakers, and microphones work. It’s much easier to fix a mistake at this stage.
Once fully assembled, use the phone normally for a day. Monitor for battery drain, overheating, or any glitches that might indicate a loose connection.
Understanding Your Repair Warranty
Every repair path has its own guarantee. An Apple-certified repair comes with its own warranty, often for 90 days. This is separate from but can run alongside any remaining AppleCare plan benefits.
A third-party shop will offer its own guarantee, usually on both parts and labor. The length and terms and conditions vary widely, so get them in writing.
A DIY repair has no warranty beyond the return policy of the parts supplier. You are the service provider.
Preventing Future Issues
Good habits extend your iPhone’s life. Avoid exposing it to extreme heat or cold, which accelerates battery aging.
Use cases and screen protectors to guard against drops. Be mindful of wireless chargers, as some low-quality ones can generate excess heat during charging.
Regularly check your battery health in settings and consider a battery replacement when maximum capacity drops near 80% if you notice significantly reduced performance.
Frequently Asked Questions
Will fixing my iPhone myself void the Apple warranty?
Yes, performing a DIY repair on your iPhone will void the applicable Apple Limited Warranty or AppleCare plan for any issue related to that repair or damage caused during it. Unrelated manufacturing defects might still be covered, but Apple can deny service.
How can I get an official repair cost estimate from Apple?
Use the Apple Support app or the “Get an estimate” tool on Apple’s website. You select your iPhone model and the issue (e.g., battery service, screen repair) to see the out-of-warranty service pricing. For a final estimate, you must complete a diagnostic with Apple.
My iPhone screen is cracked but still works. Is it urgent to fix it?
Yes, it is advisable to fix it soon. Cracks compromise the screen’s structural integrity and its seal against dust and moisture. They can also spread quickly from minor impacts and may eventually affect the touch sensitivity or display underneath.
What should I do to prepare my iPhone for any repair service?
Always create a recent backup to iCloud or your computer. If you are sending the phone in, remove any case or screen protector. For in-store service, know your Apple ID password, as the technician may need to run diagnostics that require unlocking the device.
Are Apple’s battery and screen repairs considered “one incident” under AppleCare+?
No, they are considered separate service types. Under AppleCare+, a battery service (if below 80% capacity) and a screen repair due to accidental damage are two different incidents, each incurring its own service fee.
Can I use a third-party wireless charger after a non-Apple battery replacement?
You can, but you should be cautious. A poorly performed battery replacement may not properly manage heat. Since wireless charging generates more heat than wired, it could stress a subpar battery. It’s safer to use a certified charger and monitor the phone’s temperature.
How long does Apple typically take to complete a mail-in repair?
The standard mail-in repair process usually takes 3 to 5 business days for Apple to complete the service after they receive your device. You must also factor in shipping time to and from the repair center, which can add several more days.
What is the Express Replacement Service and who is eligible?
Express Replacement Service is a premium option where Apple sends you a replacement iPhone before you send yours back. It is designed to minimize downtime. Eligibility depends on your issue, your location, your iPhone model, and your coverage type (like having AppleCare+).
My iPhone has water damage. What are my repair options?
Options are limited. Apple’s warranty does not cover liquid damage. An out-of-warranty repair through Apple often involves paying a flat rate or the full replacement value. Third-party shops may attempt component-level repair, but success is not guaranteed due to corrosion.
If a DIY repair goes wrong, will Apple still service my phone?
Apple can refuse service entirely for a device damaged by an unauthorized repair. If they do accept it, the service will be considered out-of-warranty, and you will be responsible for all costs, which could be the full replacement value if the device is deemed beyond economical repair.
Ultimately, understanding how to fix an Apple iPhone is about making an informed choice. It’s evaluating your specific problem against the landscape of options, with a clear view of the trade-offs between cost, convenience, and your device’s long-term functionality. By following this navigational guide, you can move from feeling frustrated to being in full control of your repair decision.